


Panda Security has officially stripped the beta tag from their cloud protection offering, aptly named Cloud Antivirus. Version 1.0 of Cloud Antivirus offers several things, including a retooling of the interface, better detection, and scores of bug fixes from the previous three beta offerings. The Tech Herald reviewed the first beta, and now that the software is official, I' m testingtesting it .
Panda Cloud Antivirus, CloudAV for short, is a lightweight and well-rounded layer of defense for any Windows-based system. It is a full featured anti-Malware program, which offloads most of the detection and processing to a grid of systems in the cloud. When compared to the Beta, version 1.0 has several solid improvements.
The one standout feature however, aside from the detection methods, is the interface. Panda has kept the four basic tabs to control the software, ensuring that CloudAV is easy to manage and use. In reality, the stripped GUI is aimed at users who are not all that technically inclined, but who still need the protection. This means there are no layered sub-menus to mess with, and no chance of adding a firewall rule that will kill off Internet connections.
When it comes to detection, Panda has improved on their Nano engine for this newest release, as well as decreased the time it takes the cloud protections to activate. All of this while lowering the bandwidth and system resource consumption.
Installation:
The unpacking process took about 90 seconds, and the overall installation of the software itself another minute or so. Overall, when compared to the beta, the newest version of CloudAV is slightly faster. However, we expected a fast installation, so there was no surprise here.
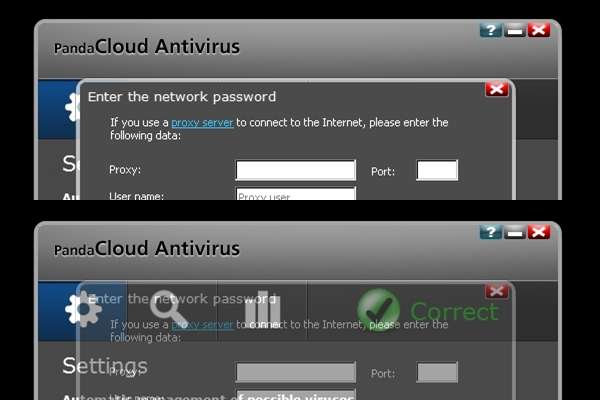
The configuration options are the same. Those of you who used Beta 3 of CloudAV and upgraded to 1.0 will be allowed to use your existing Panda account, everyone else needs to create a new one. The account allows various features, and will play a role in future enhancements. For now, what it allows is the ability to join the anonymous data collection program. The program will collect threat information and pass it on to Panda for analysis. After the installation and configuration screen where you either create or login to your Panda account, you’re ready to use the software.
Interface and Usage:
The interface seen below (showing the look of the beta on top and version 1.0 on the bottom), gives you an idea of how the look and feel has changed in the newest CloudAV release. All of the options are still there, and they all work exactly as they did in previous versions, so there will be no need to relearn the software.

If you read the review of the beta version, or you are an existing CloudAV user, then you already know the controls. However, to be brief, the image below is the main interface.
As you can see there are four tabs. The fisrt is a gear, which controls CloudAV's settings. Right now you can manage proxy settings if needed, and opt in or out of automatic management of viral infections and information sharing. In the future, this section may be expanded. To the right of that is the magnifying glass, this is where you can run a Quick Scan. A Quick Scan will search system folders, program files, and other important system areas for infections, and take action if needed. If you want a deeper scan, this is the area where you can pick a drive or folder and scan it fully.
The bar graph symbol is the report area, where you can track detection stats for the last 24-hours, week, month, or since the program was installed. The reporting gives just enough information to explain things, but leaves out information that might cause some confusion. Lastly, you have the status tab. This tab will tell you if CloudAV has discovered any problems, and uses colors to make things standout.

There is also a visual change to the GUI that is pure eye candy. When you click and drag a window, or just click and hold, it will become transparent. While this has no impact on the protection or operation of CloudAV, it’s a neat little warm fuzzy.
Scanning with Cloud AV:
The Malware detection and scanning tests were performed on an Intel Pentium D 3.4GHz CPU (Dual Core) with 1024MBs of RAM. The lab computer runs Windows XP(SP3), Internet Explorer 8, and at the time of testing, had all the current Microsoft patches.
Starting with the scan test, we tested CloudAV against 1.32GB of random files to add bulk for scanning. The files used included fonts, images and icons, PHP, HTML, and CSS files, as well as ZIP and RAR archives, for a total amount of 21,806 files. It should be noted that none of these files were malicious. Overall, the lab system was using 7.08GB of hard drive space.
One thing about the scanning in CloudAV is that the first scan is the slowest. While a Quick Scan will hit all the common areas searching for Malware, the selective scan, where you pick a folder or drive for granular scanning, was the slowest scan performed when we scanned all of drive C. Since CloudAV doesn’t offer a scheduler, you will have to launch the deep scans manually.
As mentioned, the first scan is slowest. After that, the scans will get faster as the CloudAV cache builds up. Even the selective scan, which took almost an hour to finish the first time out, shaved fifteen minutes off the total when ran a second time.
Below are the scan results.
Quick Scanning CloudAV
Scan 1: 00:06:14
Scan 2: 00:00:53
Scan 3: 00:00:47
Scan 4: 00:00:51
Scan 5: 00:00:48
Scan Average Time: 00:01:54.6
For comparison here are two manual selective scans.
(Drive C) Scan 1: 00:56:35
(Drive C) Scan 2: 00:41:44
As you can see, the Quick scan is lightning fast, and the selective scan, while much slower, still improves the more it is used. There were 322,840 files scanned on drive C for this test.


No comments:
Post a Comment